
Messenger for Business is a wonderful tool for establishing instant contact and connection with the prospects and customers. Facebook Messenger is widely used in this contemporary world to connect people at any time. It is beneficial for many customers to have a link with business organizations to mount up their level in business and there are many valid reasons to do so. One of the key reasons for using messenger is the personalized touch.
Setting Up the Plugin
To add the Facebook Messenger chat plugin on your web page, you can follow any of these methods, Use the setup tool or add a code using the developer steps.
Option 1: Using the Setup Tool
For Page Admins, the Messenger Platform provides an easy setup tool for customizing the Messenger chat plugin. In order to use the setup tool, one needs to do the following:
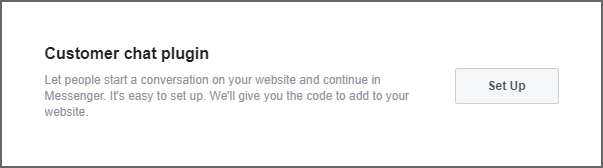
- Go to Page Settings > Messenger Platform
- In the 'Customer Chat Plugin' section, click the 'Set Up' Button.
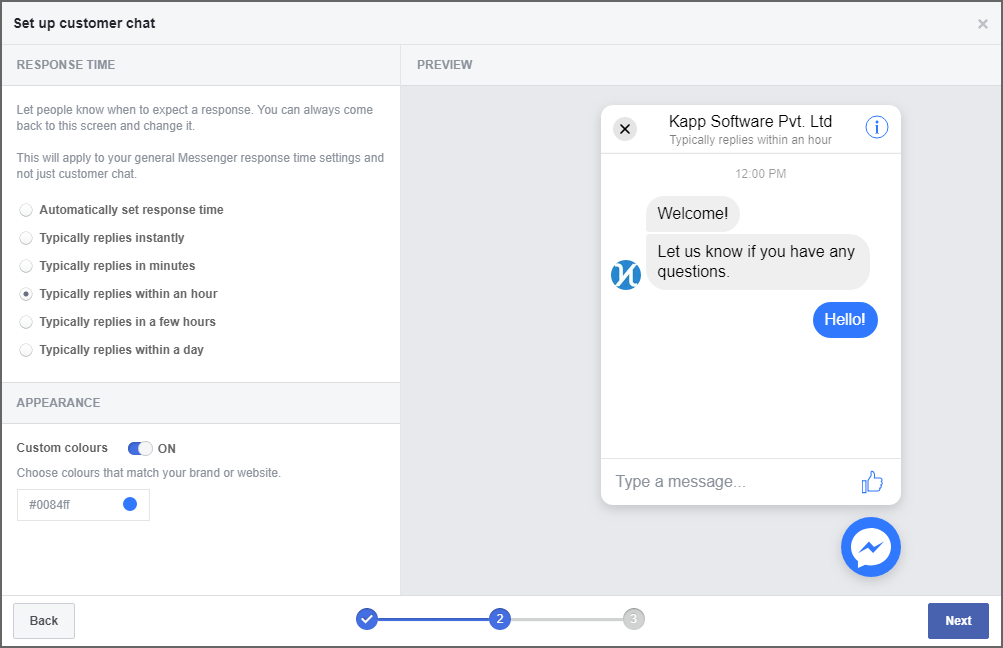
The setup tool yields a simple UI for customizing the greeting message, theme color, displayed response time and setting the whitelisted domains for the plugin.
The page allows customizing the response time based on our convenience.
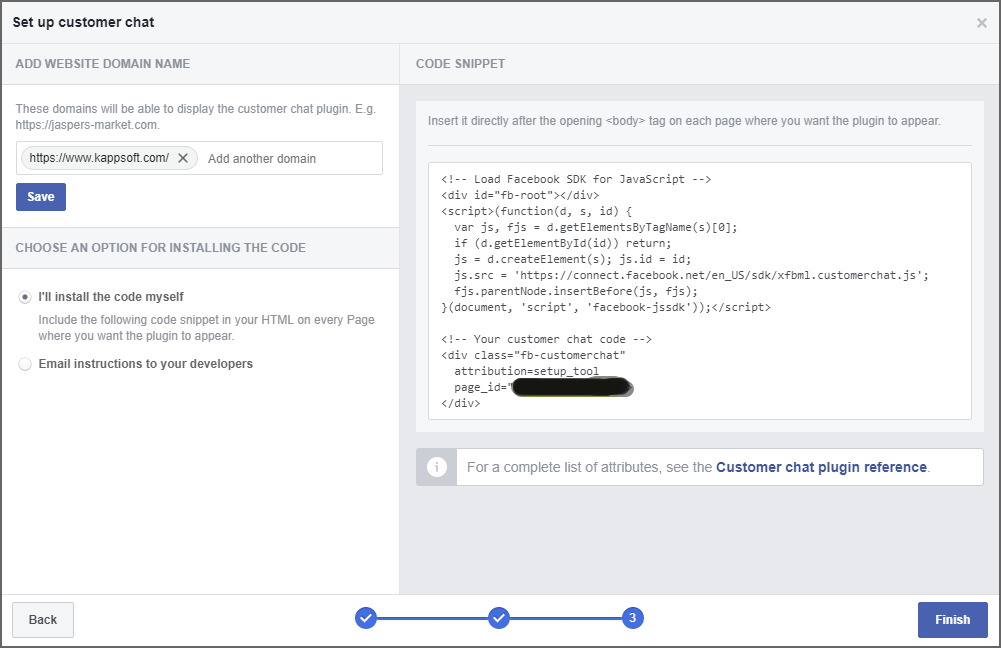
The generated code can be installed by you or you can send the code to the developers to update in the web page.
Option 2: Setup Using Developer Steps
To include the customer chat plugin on your web page, do the following:
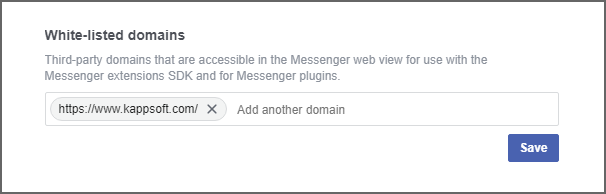
- Whitelist the domain of your website
For security reasons, only the whitelisted domain will render the Messenger plugin.
The domains need to meet the following requirements to get whitelisted:
- Served over HTTPS
- The domain name needs to be fully qualified, such as https://www.example.com/. The localhosts and IP addresses are not supported for whitelisting.
To do whitelisting follow the below:
- Go to the page Settings
- Select Messenger Platform from the left pane
- Add the whitelisted domains for your page in the Whitelisted Domains section
To add the plugin to your webpage, include the below code on your webpage
<script>window.fbAsyncInit = function() {
FB.init({
autoLogAppEvents : true,
xfbml : true,
version : 'v2.11'
});
};
(function(d, s, id){
var js, fjs = d.getElementsByTagName(s)[0];
if (d.getElementById(id)) {return;}
js = d.createElement(s); js.id = id;
js.src = "https://connect.facebook.net/en_US/sdk.js";
fjs.parentNode.insertBefore(js, fjs);
}(document, 'script', 'facebook-jssdk'));
</script>
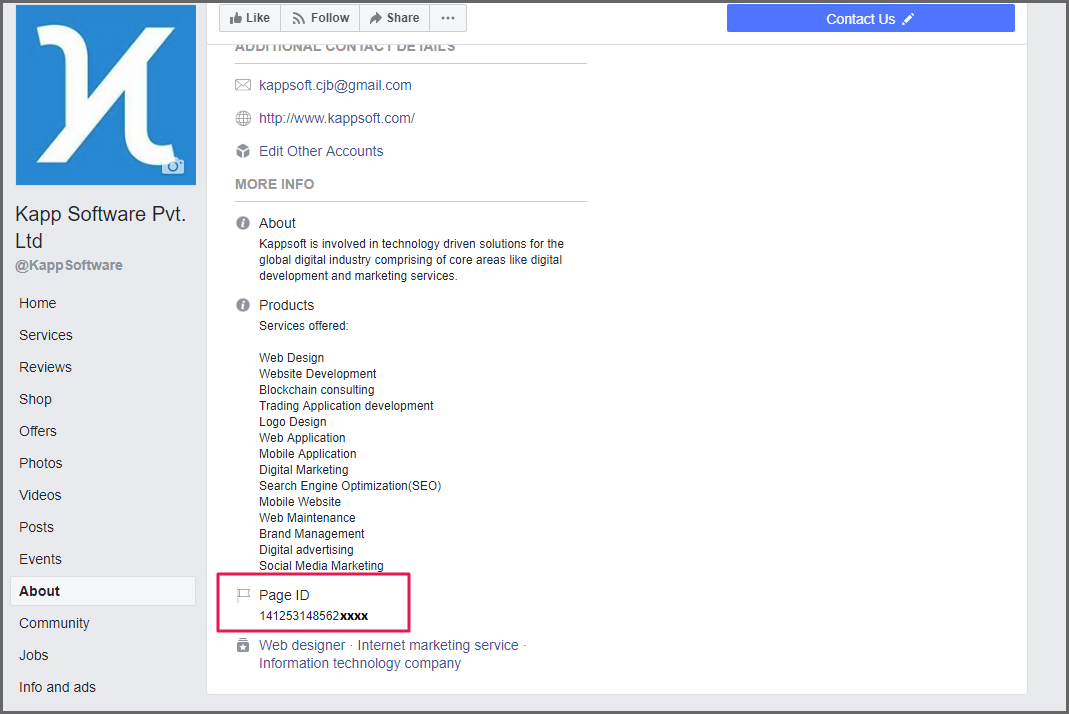
<div class="fb-customerchat" page_id="PAGE ID GOES HERE"></div>
You can find the Page Id under About section in your Facebook page.
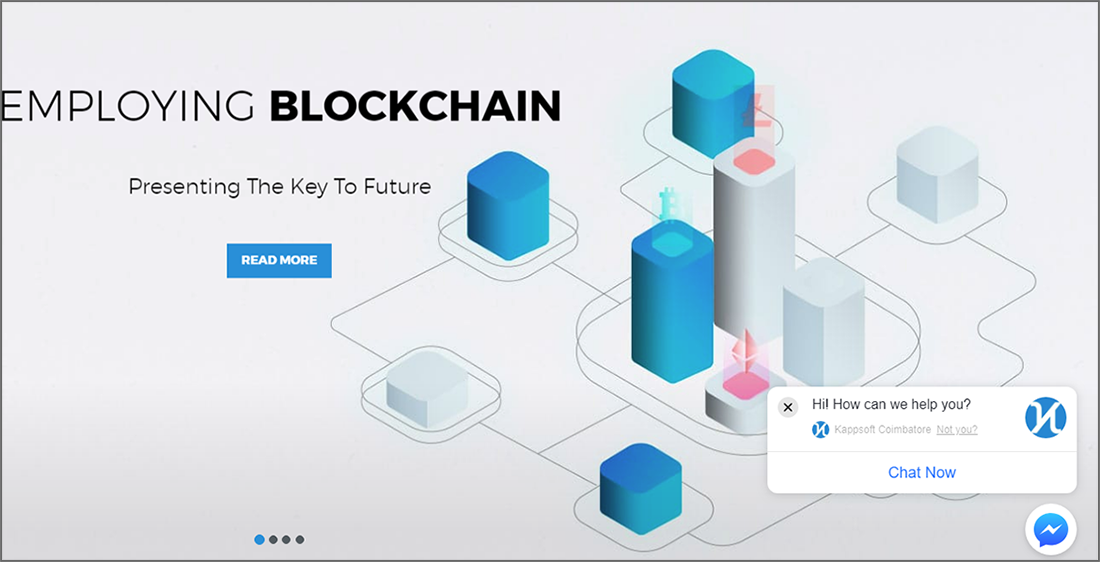
That’s it! Once you have updated the code and added the domain in the whitelist, the messenger icon will be displayed on your website.
If you need any help in integrating Facebook Messenger to your web page, feel free to reach us out.